Showing posts with label PGM. Show all posts

Making Trellises

Friday

The idea is to keep it simple. Like so many things, that takes a bit of planning.

A good trellis is.........

• Sturdy/Won't blow over
• Cheap
• Easy to assemble/take apart
• Weatherproof

and

• Doesn't make holes in the roof; holes = leaks

The key thing is to use the weight of the SIP (about 40 lbs for the 2-bucket design) to anchor something that you fasten poles to. Angled braces keep them from tipping over.

I've spent the last three Friday mornings building a simple set of trellises for about 100 2-bucket SIPs on the rooftop of the Pacific Garden Mission.


After setting a post at either end--and at each of the corners--of what viewed from above looks like a giant question mark, we used a variation of the Florida Weave to support the tomatoes, squash and cucumbers.


Each post, nothing more that a scavenged piece of 2"x4", was attached at the bottom to a 4 foot long piece of salvaged 2x10 deck joist. 1x4 angled braces were placed to prevent the post from tipping over. To keep it all in place, 2 or 3 planted SIPs were set on each 2x10 plank.

I put a few of the extra photos of the PGM Rooftop garden in my Picasa account:
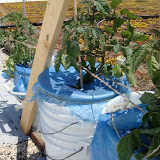

Pacific Garden Mission Rooftop SIP Garden


My rooftop garden has an overbuilt, industrial strength trellis, made of electrical pipe and 2x4's. I was worried about a tall plant catching the wind and blowing the entire thing off the edge of my roof. Now I think all that piping is overkill. Also, I could have eliminated all the "A" frames next to all the SIPs in the middle of the grid.


If I were starting from scratch, I'd make something like what I did at PGM. It's so much easier--cheaper too--and works almost as well. A downside to the Florida Weave is that you need to add a horizontal run of twine every 8-10 inches, following the plant up as it grows. Also it's only good for one season. What I did on my roof is more permanent and works year after year.

Art (Mr. H2) had another idea, one that worked well with all their 2-bucket SIPs.

He used several of the green metal grids he bought years ago at an industrial auction. If you did the same, here's your chance to put them to work.

For more good trellis ideas, check out this Fine Gardening article.

Good luck making your own!

[Updated 6.8.09 - In the comments, Russ added this useful link, "Tomato Staking Techniques Evaluation", put together by the Master Gardeners of Santa Clara (CA) County.]

Making SIPs at Chicago's Greenhouses of Hope

There's so much to say about Chicago's remarkable Nance Klehm, who invited us to meet her yesterday at the Pacific Garden Mission shelter to make SIPs with her resident staff. In the sunny Greenhouses of Hope, she oversees worm composting, seed-starting, and what can only be described as the shared joy of being around growing things.

As Nance says at her website, Spontaneous Vegetation: The greenhouses grow soil, food and people.

Take a look at the slideshow at this Chicago Public Radio link for an expanded view of the greenhouses and its resident gardeners.

When we stepped inside we left behind the bitterly cold day and entered a world of warm worm bins, seed starts, and a blooming pasture of greens, whose seed they'll capture for the next round of plants.


We got right to work on the food-grade buckets that would become SIPs, first cutting out the central hole for the wicking chamber...


...and drilling the many holes that enable air to flow into the area between the bottom of the roots and the water reservoir. The design of the official Earthbox™ has plenty of science behind it and letting the roots "breathe" is one of the ideas that produces a healthier, more productive plant.


The resident gardeners at the Greenhouses of Hope clearly love what they do and we had great fun making SIPs with them. They gave us a detailed tour of the worm bins they create and the vermicomposting (composting with worms) process and components, including food scraps from the mission kitchen, newspaper, and, naturally, worms.

The worms produce nutrient rich worm castings, which are in turn used to grow the next generation of plants. This means that there's no need to pay for food waste disposal or to buy expensive fertilizer for new plantings. More importantly the program gives the residents a place to shine.


We're planting a young avocado tree--oops, too deep! Nance steps in to guide us.


After watering in the transplant, it's time to fill the reservoir.


The "shower cap," made from a garbage bag, goes on top, is secured with string, and voila: the first container finished.

We're thrilled to be able to pass on this technique and can't wait to go back to help build more. Thanks for asking us to participate Nance!

Check out Nance's site for info on purchasing worms and vermicomposting bins from the Pacific Garden Mission.

Updated 6.5.2009 -- Bruce went back to PGM and built trellises for the SIPs that were placed on the roof of the building.  Check out the cool pics.
 

Popular Posts